My Lady Loki Cosplay was my second
Cosplay and it´s still one of my favorite Cosplays, which I already
partly reworked twice. I´ve made it for the Leipziger Bookfair in
2015. My intention from the beginning was to make this my first
Cosplay to build an armor for.
It´s my own design inspired by several
fanarts, nordic mythology, other Lady Loki Cosplays and of course the
design of Loki in the movies from Marvel. It was a long process to
make my own design out of all the sourcess I´ve found.
I didn´t made a draft of the hole
Cosplay, settled how everthing will look and then just followed this
plan and built every piece after it. But I made only a rough draft at
the beginning and decided while I built the pieces how they will
look like and what other pieces would look good two it.
At the end I built a lot more armor
pieces then I planned cause I just thought that it made the Cosplay
look a lot more badass.
I started with the sewing part. The
petticoat is made out of green tulle and green cotton biastape. The
skirt has two layers of tulle. That´s not that much but I didn´t
want to make it look to voluminous, not to 50´s like so it still
could fit to a nordic badass god villain. Over it comes a simple
circle skirt made out of cotton, so basically it´s only circle with
a hole in it.
The pattern for the dress was selfmade.
The dress consists of a top and the flaps that hang over the skirt.
The dress is also sewn out of cotton. I thought that cotton would be
from the onside something to sew easily and from the other side
simple to, relativ steady fitting for a warrior and nordic mythologie
character. The cape is just a to the bottom widher becoming square
with black biastape at the edges as a nice contrast and to make it
look cleaner. On the cleavage of the dress is also black biastape to
hide my shamefully unclean sewn border.
The corsett and the necklace are just
buyed. The corsett was originally just an emergency solution cause I
messed up with the tucks. To hide the so developed pleats I just
tried how this not for cosplay ordered belt would look to this and it
really upgraded the whole cosplay.
The pocket is made out of fake leather.
It was not part of my orignal draft but I needed something to carry
around my phone, wallet, keys, cosplay emergency kit and co during
the con. It took quite some time to create the pattern. Pockets are
harder to make then often expectet especially square ones. The
closing is made out of two fake leather stripes with snap hookes. On
the front side I painted Yggdrasil the tree of the worlds from the
nordic mythologie with golden Acrylics.
The first part of armor to build were
the bracers. The design based on the bracers of Loki in the Thor
movies. The base is foam rubber sandwiched with Worbla. The
decoelements are burned in the worbla with a soldering iron. Primed
with woodglue and painted with acyrlics. The bracers were actually
the first armor piece I ever build with Worbla.
The shoulder armor consists of two
plates Worbla with a expanding foam core. The motives are just cutted
out of worbla. They are meant to symbolize the fenrin wolf, which is
in the nordic mythologie a child of loki, and the silhouette of
Asgard (from the movie).
I made two square holes in both pieces to
put a douple layered stripe of black fake leather through it. The
stripe is closed with velcro tape and goes once around the upper
body.
The upper arm armor design is directly
based on the design from the Thor movie. Like the other pieces it´s
made out of a craftfoam sandwiched with Worbla. The decoration is
cutted out of the Worbla and the little balls are made of Worbla
scraps. It´s closed with two elasting bands going around the arm and
closed with velcro tape.
The shoes armor are my own design.They
are only made of Worbla and craftfoam. The scales are out of Worbla
and were all cutted out by hand (nearly 360 induvidal scales!). Of
course they were all placed by hand also, which nearly took forever.
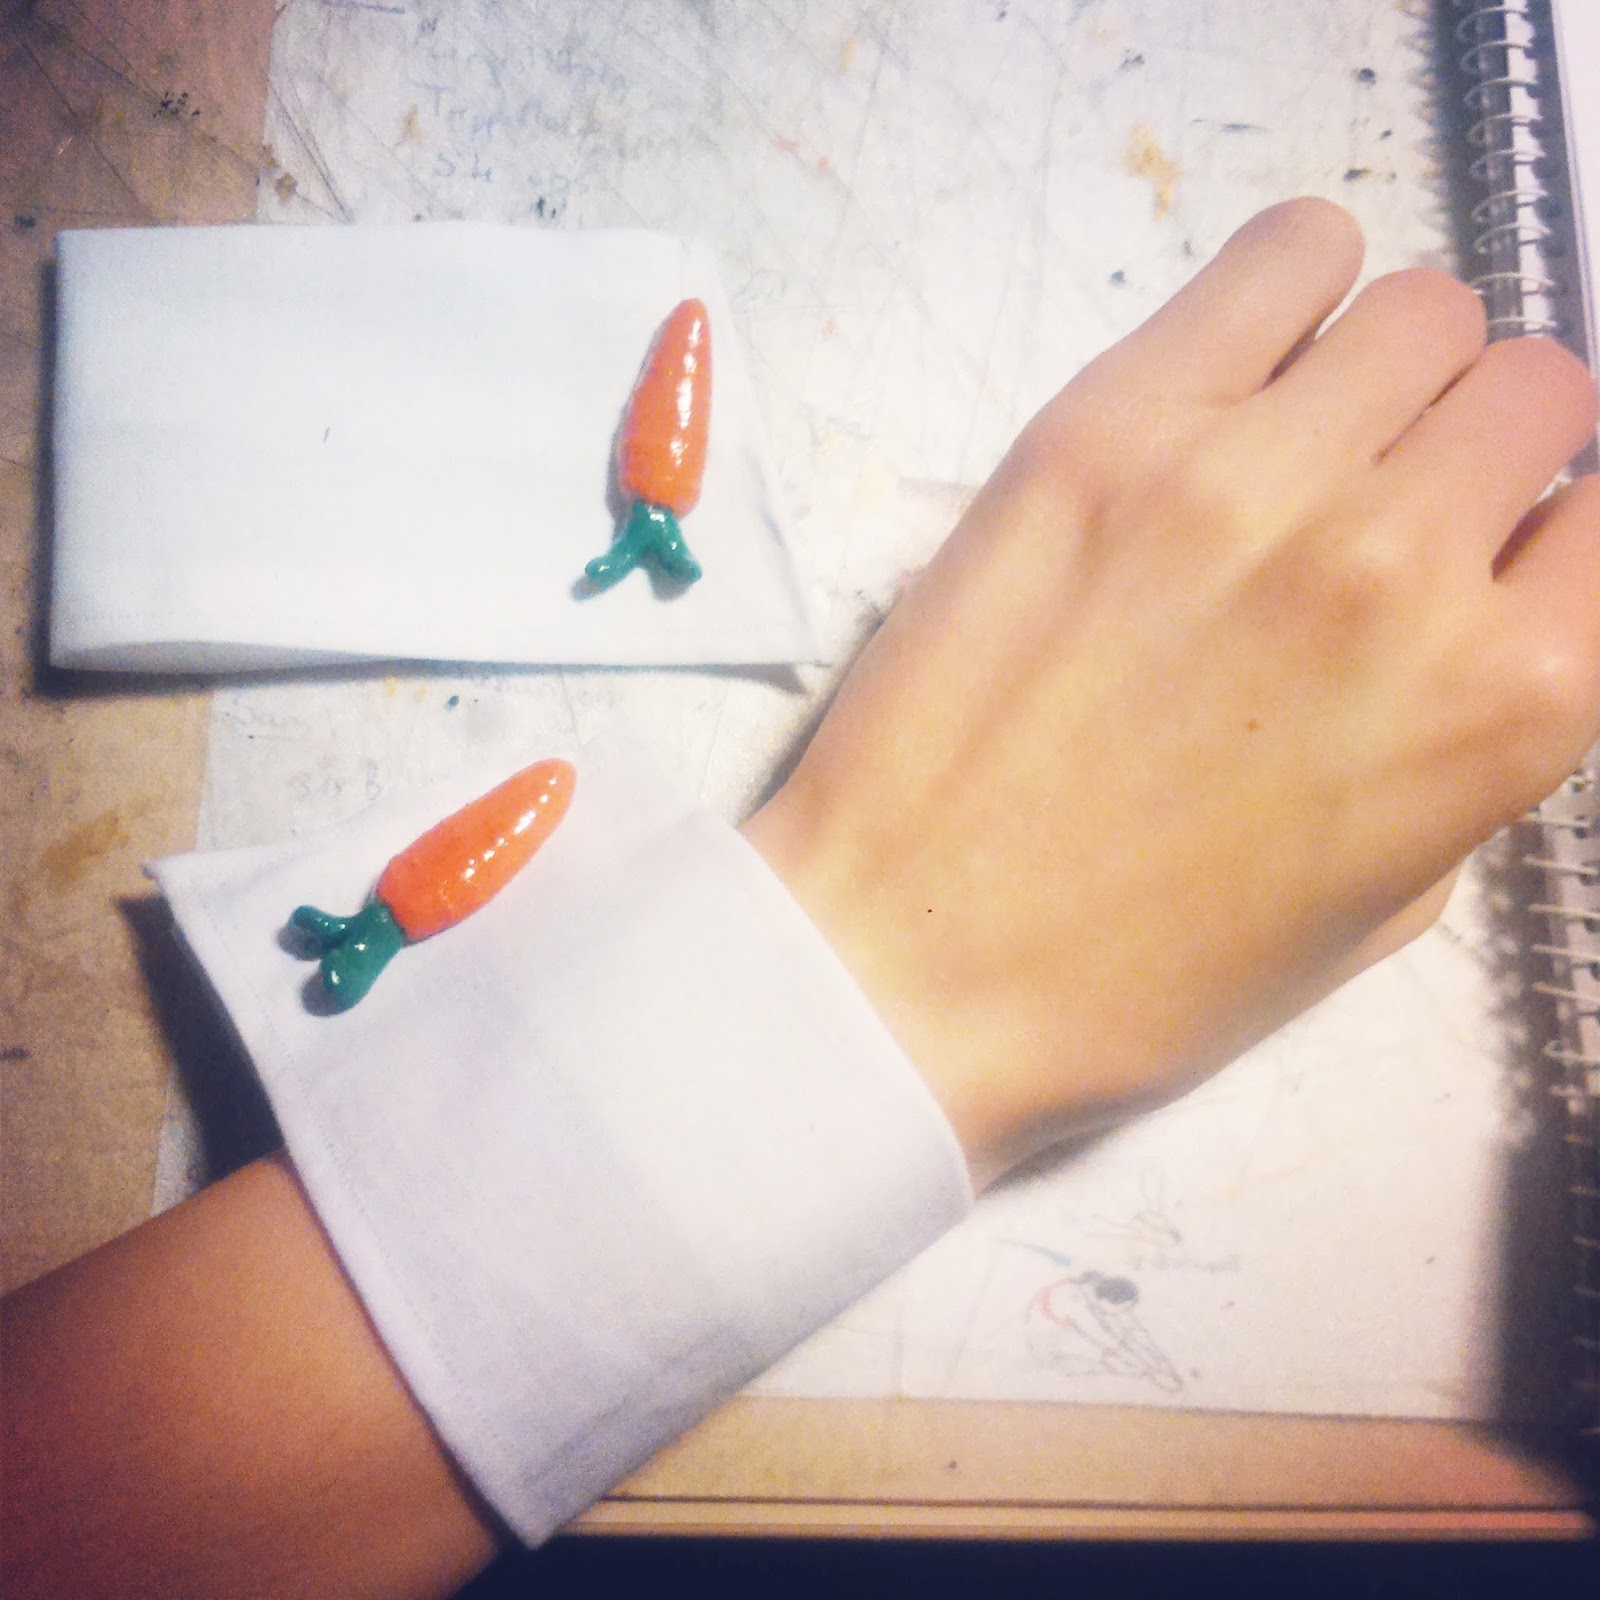
On the
pictures you can see very well what a difference shading can make
when you paint your armor. On
the second picture you can see the difference between when you only
paint your armor with the basic colour and when you add some shadows.
It already adds a lot depth to the armor. At the third picture
you see both pieces with added shadows. And the last picture shows
the difference between only added shadows and with also add some
highlights.
Adding
highlights will define the edges of your armor very well and make the
colour pop out more also. The armor is closed with a fake leather
stripe fixed on the armor and closed with velcro tape.
The heel armor was added by me two
years later when I wanted to wear the cosplay again for a Convention.
They are made of Worbla, each scale again cutted out of Worbla by
hand.
On the right side you can also see the
ring I added to the cosplay. Also made out of Worbla and also each
scale cutted out by hand (at least this time it were like only 10
scales).
To the shoes does not only the armor
pieces belong but also a a fake leather stripe put a around the
bootleg. For the heming I used a bright yellow yarn to make a little
decorative seam. The bootleg stripe and th closing stripe for the
shoes armor are both hemmed by hand.
The leg armor was originally more an
emergency solution. Originally I wanted to wear boots which are going
until the knee with some Worbla decorations but this plan didn´t
work out. So instead of boots I decided to wear the other shoes and
add a leg armor. The design of the leg armor is based on the design
of the boots of Loki in the first Thor movie. The base is made out of
Worbla. The middle part is fake leather glued to the Worbla and
decorated with Worbla to imitate the design of Lokis boots.
On the right picture you can also see
the knee armor . It is made of craftfoam only. Originally I had made
them of Worbla but they looked just strange and also restricted my
walking to much. So I made them again of simple craftfoam so they
would still be flexible. They are not shaped by heat but took their
form by themselves whenI put them around my knees.
Armor only made of craftfoam tends to
brake more easily then armor made of Worbla. But actually after three
Conventions they still hold very well. They still have no damage and
are also quite comfortable.
The last thing I built were the most
recognizable part of Loki, his horns. I actually procrastinated to
build them cause I was very afraid to fail at. I decided not to make
a helmet like Loki weares in the movies but a kind of headband.
The design of the headband was made by
me.
The base shape is made of craftfoam
sandwiched with Worbla to make it extra durable. The horns are
sculptured of Fimo Air Light, an extra light sculpting clay. They are
not perfect but for a first try they look quite well I think. They
are fixed to the headband with screws which is very durable. I put a
Worbla band at the part were the horns and the headband connect to
hide the not so pretty seam.
The headband has two d-rings on the
backside and a velcro tape stripe going through them to put the
heandband around the head. This is not the most elegant solution
cause you can´t hide the velcro tape stripe under the wig but at
least its black like the wig so it´s not that noticeable.
The horns were also painted with
acrylics
 |
| Foto by Hartmut Rohde |
 |
| Foto by Narya Cosplay & Art |